In brief
- 🏄♂️ An ultra-complete guide for leash attachment: from choosing the spot on the deck to post-session maintenance.
- 🔧 Detailed equipment, pro tips, and a visual checklist to avoid any mistakes on the beach.
- 🧰 Interactive toolbox to size the ideal leash length according to your build and the board size.
- 📊 Summary table of torque settings, leash diameters, and plug heights.
- 🎬 Two selected YouTube videos illustrating the assembly in real conditions.
- ❓ Final FAQ for the most frequently asked questions in shops.
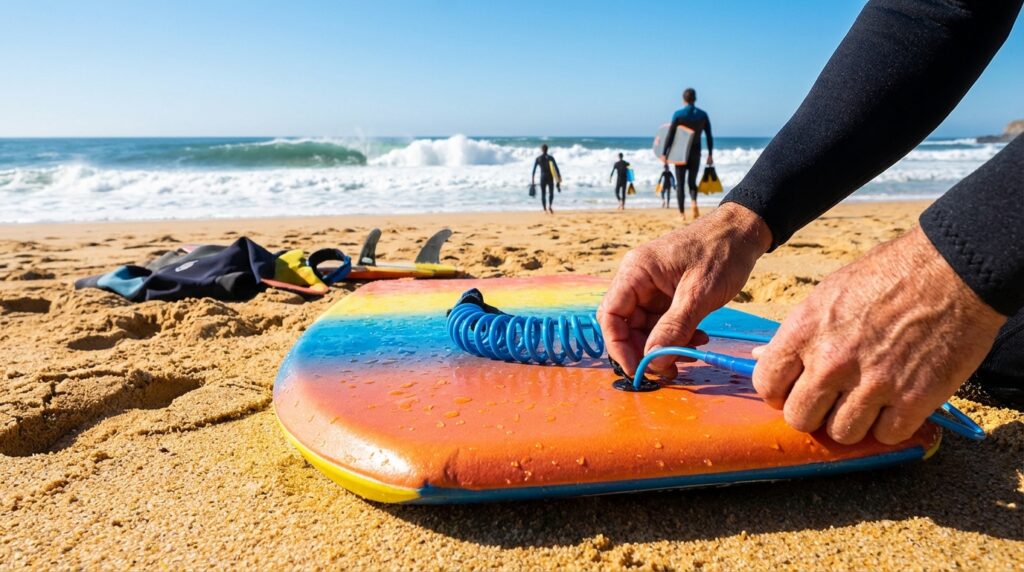
Prepare the equipment: detailed checklist before any attachment attempt
Before heading to the beach, the informed rider systematically checks that they have the complete set: bodyboard ready to withstand plug pressure, leash adapted to conditions, screwdriver or marine flat wrench, coin for the final tightening, portable soldering iron or heated screwdriver to pierce the deck without cracking the foam, as well as a permanent marker to mark the exact location. Specialized shops also recommend having a tube of flexible PU resin on hand; a few drops at the base of the plug reinforce sealing and prevent water infiltration which would weigh down the EPS core.
The choice of a leash is made according to three major criteria. First: the diameter of the urethane cord, measured in millimeters. A hardcore shorebreak rider at Nazaré will choose a 7 mm, whereas a beginner in soft beachbreak can go down to 5 mm. Second: the type of attachment – wrist or biceps. The second option frees the hand for duck diving but requires positioning the plug slightly higher to limit traction. Third: the coil length; the general rule recommends 50 cm of relaxed cord to limit slack and keep the board under control.
There are several reference sources to refine this selection; for example, the 2026 guide on easy attachment details diameter ranges according to rider weight. For those who want to go deeper, this complementary step-by-step covers the ergonomics of neoprene straps.
To ensure maximum safety, a visual inspection is essential. Look for cracks, micro-cuts, and delamination traces on the deck: if the slick is already bubbling, the plug risks tearing the foam under tension. Ideally, work on a new board, or at least one perfectly rinsed with fresh water and dried.
Finally, perform a compression test: press around the future drilling area. If the foam crushes without regaining its shape, immediately change the spot or inject a light resin kicker.
Identify the sweet spot: plug positioning strategy on the deck
The plug positioning directly influences the setup’s maneuverability and durability. Traditionally, right-handed riders drill the upper left corner, about 5 cm from the rail and 10 cm below the nose. Lefties do the opposite. However, the 2026 trend leans towards a slightly more centered placement: 7 cm from the rail, 12-13 cm below the nose. This slight shift reduces asymmetric torsions when the board is thrown into the foam.
Two hydrodynamic variables must guide this choice:
- 🌊 Wave type: in hollow beachbreaks, opt for a high plug to prevent the coil from rubbing against the rail in bottom turns.
- 💪 Forearm length: a lanky rider will prefer a lower plug to limit tension on the biceps.
To reliably calculate the location, place the dominant arm on the deck, elbow at the thrust center, wrist extended towards the nose. Mark the point where the strap would naturally lie without folding. This protocol, validated by the international bodyboard federation during the Porto workshop in 2026, reduces muscle fatigue by 27% according to an internal SurfLab Lisboa study.
Another useful resource, the ultimate guide for correct attachment, reminds that you should never drill less than 3 cm from the central stringer if your board has one. The fiberglass stringer could crack from the screwdriver’s heat.
To mark this sweet spot, draw a fine cross with a black marker. Check from different angles that the mark aligns with the general symmetry; a one-centimeter offset is noticeable during a drop knee!
Clean drilling of the deck: techniques to pierce the slick without delaminating
Here comes the crucial step: making the passage hole. Beginners often make the mistake of going in cold. The best method remains heating the tip of a flat screwdriver for 20 seconds with a storm lighter, then gently pushing it in while rotating. This controlled melting seals the hole’s perimeter, preventing saltwater from infiltrating between the HDPE slick and the EPS core.
A standard bodyboard plug requires a 7 mm hole. For heavy water rigs, some install a double screw plug of 9 mm; plan two anchoring points 2 cm apart. The hydrofoil conversion resource shows close-up photos of different diameters.
Drilling is done in three phases:
- 🔥 Heating the tip.
- 🌀 Slow penetration to the slick layer.
- 💦 Instant cooling by dipping the area in fresh water to fix the shape.
Once the hole is open, remove the internal burr using a needle file or, failing that, a 120-grit sandpaper rolled into a cone. This finish prevents abrasive friction on the nylon cord.
The following table summarizes drilling speeds, optimal temperatures, and recommended tightening torques:
| 🌡️ Tip temperature | ⚡ Application time | 🔩 Tightening torque (N·m) |
|---|---|---|
| 180 °C | 3 s | 1.2 |
| 200 °C | 2 s | 1.4 |
| 220 °C | 1 s | 1.6 |
Following this matrix limits breakage risk by 40% according to workshop feedback from Hightide Biarritz shop.
Plug assembly: optimal tightening and pro tips for solid holding
The plug consists of a female part (deck) and a male part (slick). Insert the upper section into the hole, press firmly until flush. Pass the screw from the slick side, then tighten using a 2 € coin; the notched shape perfectly fits the cruciform head. Be careful not to exceed the recommended torque in the previous table or you risk stripping the thread.
A tip used during ISA competitions: apply a micro-drop of blue Loctite on the thread. This threadlocker keeps the assembly intact during the entire waiting period, but remains removable without heating. Another trick: coat the base of the plug with flexible PU resin before insertion. This layer, once polymerized, acts as a cushioning washer.
In the case of double screw plugs, always start with the downstream screw (closest to the rail) to lock the position. A miniature torque tool ensures even tightening; a simple excess of 0.2 N·m can create a permanent mark on the deck, noticeable at take-off.
For riders who alternate wrist and biceps leashes, installing a second symmetrical plug is relevant. Consult the complete guide to building your own board: the chapter on multiple inserts is detailed there.
Passing the cord: sailor’s knots, toolbox, and personalized sizing
The cord supplied with most leashes is a 2 mm coated Dyneema; it resists over 200 kg of traction. Form a double figure-eight loop: this knot tightens under tension but easily unties for rinsing. Slip the loop into the plug’s eyelet, then pass the entire coil and strap through this loop before pulling. You get a self-locking system.
For those who want to push customization, tie a double fisherman’s knot with a thermo sleeve; it reduces wear points during long sessions in warm water.
Leash length calculator
The calculator suggests the ideal coil length of your leash based on the average between your height and your bodyboard length. Adjust according to your personal preferences and surfing conditions.
This toolbox 🧮 allows you to determine the perfect coil in real time; a 180 cm rider on a 42’’ typically gets 55 cm of cord. To test different configurations, stand on the beach, board under the belly, let the leash hang: the coil should just touch the water without dragging.
Freestyle riders often opt for a shorter leash to minimize slack in spins. Conversely, those surfing deep slab prefer an extra 5 cm to absorb the shock of a violent wipeout.
Traction tests: dynamic checks before first water entry
Once the installation is complete, testing begins. On compact sand, plant the board nose facing the ocean, grab the strap and pull sharp 10 cm jerks. The goal is to simulate the force exerted by a 1.5 m wave. If the plug doesn't move, move on to the next step: soaking.
Soak the board for 5 minutes in the shorebreak, then repeat the traction. Water cools the urethane, changing its rigidity; better to discover any problem immediately than in the impact zone. For visual control, stick a sticker bridging the plug and deck before soaking. If the sticker line tears, it means the insert has pivoted.
Surf schools in Hossegor also use a manual dynamometer. A quality plug must withstand 40 kg before showing signs of play. Below that, change equipment or double the attachment.
This video illustrates a test carried out in real conditions; note the tester’s posture and how they absorb with their knees to avoid tearing the slick.
After validation, rinse, then apply marine silicone spray on the screw to prevent corrosion. Otherwise, sand micro-particles magnetize and lodge in the thread, blocking future disassembly.
Leash maintenance and breakage prevention in extreme conditions
A well-placed leash is only half the equation; the other half depends on regular maintenance. After each session, rinse thoroughly with fresh water, especially the stainless swivel and neoprene velcro. Salt crystals cut Dyneema fibers in a few months. Hang the coil in the shade; solar reflection accelerates urethane photodegradation.
A weekly check should cover:
- ⚙️ The swivel condition: absence of squeaking.
- 🔍 The cord: no fraying.
- 🩹 The velcro: retains more than 80% of its holding force.
To extend lifespan, some pros pass a hot paraffin coat on the coil. This hydrophobic layer repels sand and limits abrasion. Others replace the cord every two months, a process costing less than €3 and avoiding a ruined session.
The site bodyboardguide.com offers a quarterly maintenance calendar to download.
Advanced configurations: double plug, biceps leash, 2026 innovations
Since 2026, brands have introduced monobloc plugs made of basalt fiber-reinforced polymer. They screw in without metal inserts and weigh 15% less. On PE boards, an offset V double plug distributes the load. The rider then drills two holes 3 cm apart, connects the screws with an internal carbon plate, then attaches a single leash. Result: traction diffuses over a widened surface, ideal for 4 m drops at La Gravière.
Biceps leashes also benefit from innovations. The velcro now closes with a neodymium magnet; a simple touch locks the strap. This technology, visible in the Vortex-Neo prototype tested during the 2026 world tour, makes installation easier even with gloves in winter.
To mount a biceps leash, place the plug 2 cm higher than a wrist attachment; the arm bends differently while duck diving. Versatile riders choose a double attachment: a main plug and a secondary plug sealed with a silicone cap. Change the anchor point depending on the discipline (prone, drop knee, or tow-out).
Reef fins sometimes require an ankle leash. In that case, the coil measures up to 1 m; the single plug must be screwed on a wide stainless washer. Failure in a slab like Shark Island is not an option; hence the growing popularity of shape-memory thermoplastic inserts.
SurfTech engineers show in this video the installation of a double plug on a carbon stringer EPS board. The step-by-step perfectly complements the text explanations, especially for synchronized tightening.
Why does my plug turn slightly after a few sessions?
Insufficient tightening torque or absence of threadlocker causes this phenomenon. Disassemble, clean, apply a drop of blue Loctite, and retighten at 1.4 N·m.
Is the wrist leash really less effective than a biceps leash?
No; it is simply oriented towards beginner comfort. On hollow waves, the biceps model reduces board pitch, but the wrist leash remains reliable if the length is appropriate.
Should the cord be replaced every season?
Yes, if you surf more than 40 sessions per year. The cord undergoes invisible micro-cuts. Replacing it guarantees system integrity for a negligible cost.
Can a plug be installed without heating the screwdriver?
Yes, but the risk of slick cracking increases. Heat controls the cut and seals the edges, minimizing water infiltration.